Deck the Halls with Wires and Sawdust, Fa La La La La, La La La La!

Tis the season to be jolly, fa la la la la, la la la la!

Not only is this the season to be jolly, it’s the season to be BUSY! We’ve had some ups and downs, but we are getting a lot done on the house.

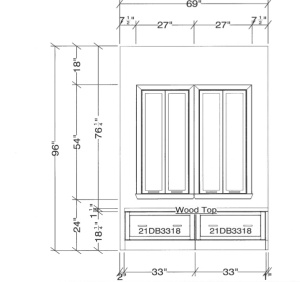
When I last posted, we were supposed to have the HVAC contractors, siding guys, and the cabinet guy come the next week. Only one person (Rick from Lensing for the cabinets) showed up on Monday, November 25. He measured and looked like everything was going to work out just great . . . until he left. 😯 Key the drama button. Duh duh duh duh! I got back up to Jill’s house and Bill asked me if I told Rick that we were going to have stone all the way back to the wall on each side of the fireplace. Uh, No!!!! I forgot to tell him that! 😡 I quickly gave Rick a call. Rick had done Jill and Jim’s window seat on one side of their fireplace and kid’s computer desks on the other side. He was going on the basis of how they stopped their stone just around the edge of the fireplace since they had cabinets on each side. We estimated how thick the stone would be and made the window seats shorter than he measured. He was going to draw up plans and send to me for approval before he ordered them. Here is a snapshot of the window seats. I decided to go with drawers instead of doors as I thought we’d use the drawers to store blankets, throws, etc.

Window Seat Drawing by Rick at Lensing

Window Seat Drawing by Rick at Lensing

Tuesday, Nov. 26, the siding guys showed up. The siding had not been delivered yet. That was a blessing in disguise. Turns out the siding guys said they could not install our siding until our electricity was installed. Really? Did no one ever mention that the electricity needed to be installed prior to the siding installed? At one time we were going to have the electricians come right after plumbing but that didn’t happen. The siding guys said that since we were installing flood lights on our fascia, the electricity would have to be run before they could install siding. Jim questioned why they couldn’t start at the bottom of the house and work their way up; but, they said they preferred to wait until all electricity was run. Some things are just meant to be. I believe that is what happened in this case. The siding guys did a few preliminary installs on the corners of the house and called Benthall Brothers (our Hardie cement board distributor) to hold off delivering the siding. And, then they left.

Jim called our electrician to see what his schedule looked like and when he could pencil us in. Fred (electrician) said he was on a big job and had a couple more scheduled after that but probably could not get to us for a couple of weeks – around the second week of December. 😦 Yikes! Everyone was beating their heads thinking we really should have scheduled the electrician before now because we couldn’t move forward until that part was done. But, Bill and I found out there was still lots we could do before he arrived. It was Thanksgiving that week, and I had some Christmas shopping to do, people!

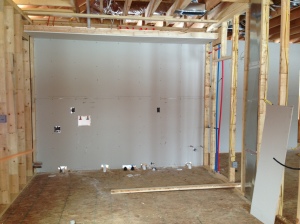
The HVAC guys came back to finish up their rough-in work on Wednesday, Nov. 28. I don’t have many photos of that. Not much to look at but some vents and tubing for the exhaust fans in the bathrooms. What I did take pictures of was the venting done for the kitchen chimney range exhaust fan. Our exhaust fan looks like this.

Our Range Chimney Exhaust Hood

Our Range Chimney Exhaust Hood

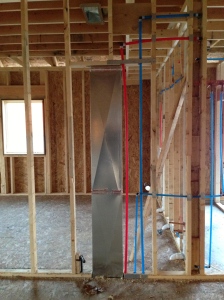
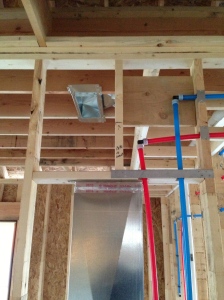
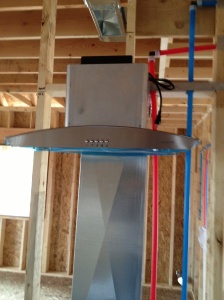
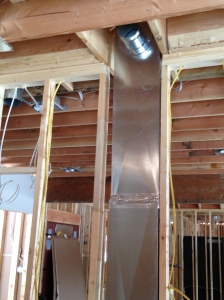
So, the HVAC guys decided to vent the exhaust fan down, through the crawl space, and out the side of the house. They said they didn’t want to go all the way up through the roof. So, this is how they roughed in the venting.

Venting the range hood

Venting the range hood

Closer view

Closer view

I kept telling Bill I just didn’t think the venting made sense to me the way it looked. He said something was off. We had a 17″ tall cabinet going above the vented area.  We didn’t think things were right. We decided to wait until after Thanksgiving and see if Bill could figure out if the venting was correct or not.

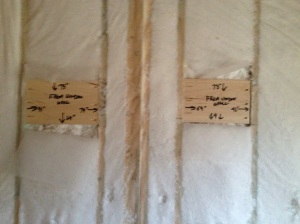
In the meantime, Bill said for me to be thinking where we might want electrical outlets and switches for our lights and fans. He wanted us to do our own walk-thru and mark where we wanted things placed before our walk-through with Fred the electrician. OMG, making all those decisions was a long and hard process. Yes, we had an electrical floor plan – but that was where light fixtures, can lights, exhaust fans, ceiling fans, and exterior lights would be installed. So, I got out my floor plan from my 3D software which had furniture placed in it to decide where I might want those outlets and cables for digital phone and TV and where I wanted CAT5 cables run for Internet. Bill & I worked on this project several days marking up the house and stapling labels on the studs.

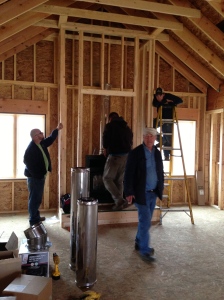
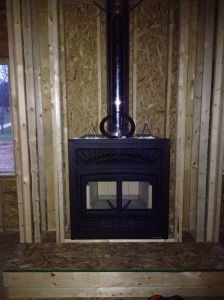
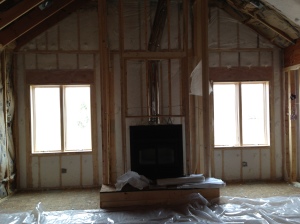
On Tuesday morning, December 3, the fireplace installers arrived. It was great to see the fireplace inside the frame.

Fireplace installation

Fireplace installation

Fireplace inside the frame

Fireplace inside the frame

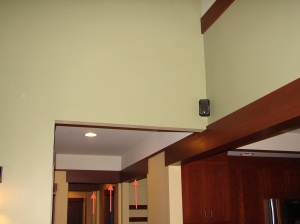
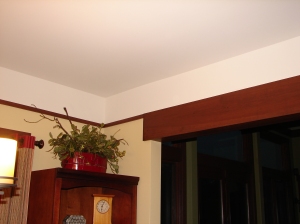
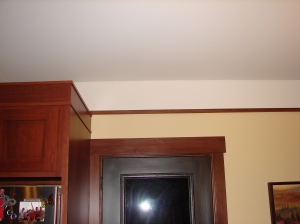
While the fireplace was being installed we had a planned walk-through meeting with Mark from Wood Specialities by Fehrenbacher. Mark has worked with us for well over a year in creating a custom baseboard, selecting wood trim for our windows and doors, selecting a design for our wooden interior doors, and headband and beam design for the family room ceiling. He gave us some ideas about transitioning from the 9 ft ceiling entry to the vaulted section of the family room. And, we were able to discuss material for a double mantle for the fireplace. He measured everything in the whole house. He said he’d send us a new quote for everything within a week or so. He did ask if we had picked out a stain color yet. I told him I was waiting for our front door to be installed so I could see the color. I wanted the stain color to match our front door and the cabinetry throughout the house. Mark said once we picked out the stain color, he would need some of it to put on the interior door sections that might expand – prior to the painter doing the staining.

Bill called our painter Mark and asked him about stain and how we went about picking out a color. He said he liked using Zar wood stain and asked that we go pick out a color at the Newburgh Benjamin Moore store. We put that on our to-do list.

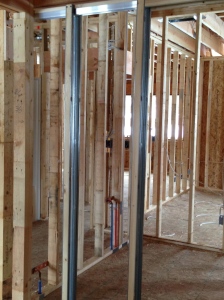
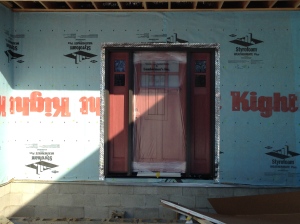
Our front door had been delivered, but we were waiting on the framing crew to stop by and install it. You couldn’t see what the door looked like because it was totally boxed up. I think it was late the next evening that framer Greg and his crew came and installed our front door and the pocket door mechanism for the master closet.

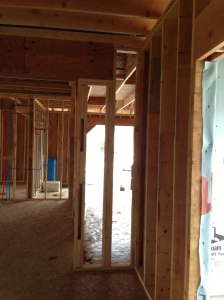
Pocket Door Mechanism

Pocket Door Mechanism

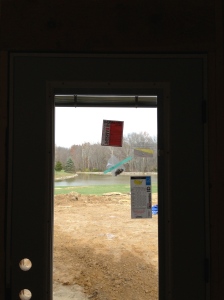
Front Door Interior View (still has cardboard on it to protect it)

Front Door Interior View (still has cardboard on it to protect it)

Exterior view of the front door (has plastic on the center section)

Exterior view of the front door (has plastic on the center section)

Earlier in the week, Bill got back to looking at the venting for the range fan. He ended up getting the fan out of the box, going through the installation guide, and temporarily tacked it up to where it should be installed to see if the venting the HVAC guys would work. Here’s what he found out.

Range Fan and strange venting

Range Fan and strange venting

The venting wasn’t going to work as it. It needed to go up a lot higher. Bill text Jason the HVAC guy along with the photo above and asked if he would please come by to discuss how it could be changed. And, he said it needed to be changed before insulation was put in. More on this later.

And, while we are talking about HVAC, Jason had asked us a couple of weeks ago if we wanted to take the federal tax credit for the geothermal unit in 2013 or in 2014. The Federal credit was 30% of the cost (with no upper limit) and that included installation of it all, too. Bill and I decided since 2013 would be our craziest year for taxes (Bill retiring, both of us going on Social Security, taking out monthly retirement allocations, Medicare, selling a house, and building a new one), we thought it would be best to use the tax credit for this year. However, to do that, we had to be billed for the geothermal unit and pay for it in 2013! It was December and we had to send in our December construction draw to the bank by December 5 to get money to pay contractors by the 10th. Bill made all the phone calls and did the leg work and got an invoice for everything just in time to turn it in to the bank! Whew!

Then the weather took a dive. Thursday afternoon, December 5, we went from freezing rain to ice to snow. Friday, December 6, it snowed all day. We ended up with over 7 inches of snow. See, it was a huge blessing that the siding was not delivered. That would have been a mess!

Snow storm

Snow storm

Jill & Jim's driveway

Jill & Jim’s driveway

Needless to say we had nothing going on down at the construction site until the following week. During the snow hiatus, Bill was able to work on the cabinets a couple of days. He finished all the drawers and drilled the holes for the handles.

Cabinet drawers

Cabinet drawers

Fred the electrician called and we scheduled our walk through with him for Monday, December 9. He was impressed with all our work we did marking what and where we wanted outlets. He made his markings on the studs as we went from room to room. Oh, and I decided to make the exercise area in the laundry room my computer area instead. 🙂 I made sure we had lots of outlets and cabling for that area. Fred said they would be back on Tuesday or Wednesday to install it all.

In the meantime, Bill had made arrangements with the drywall guy Bart and Les the insulation contractor since they were next up after the electrician in the interior. Bart had to install some drywall on a couple of walls between the kitchen and garage and the laundry room and garage before Les could install foam insulation in those areas. Bart made arrangements to have some drywall sheets delivered. The drywall was delivered on Monday, Dec. 9. Bill called Bart and he said he’d be out as soon as he could.

Jim called the siding guy and told him that the electric had been roughed in. He said they were working on a job and had one or two jobs afterwards. He said it might be Christmas week or after before they would get to us. Then we talked about the possibility of getting the front porch poured before the siding was installed. Jim called the concrete guy to find out his schedule. He said that in the winter they prefer not to “blanket” colored concrete as the finish doesn’t come out as well. So, he said that if the temperatures didn’t get below 26 degrees for 4 days in a row after pouring the concrete, he could pour it for us. So, Jim told us to keep an eye on our weather app.

So, no one showed up on Tuesday, December 10.

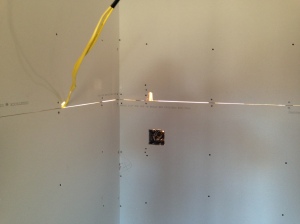
The electrical crew arrived on Wednesday the 11th. They were by far the messiest crew we cleaned up after; however, they were the quickest! They installed it all in less than a day! Bill called me when Fred said he couldn’t really install as many can lights above our island as was on the electrical plan. He said they would be too close together. Bill wanted me to come down and “approve” the change. It was a good thing I went down there. I found a couple of things that were not installed correctly. The fewer cans above the island was fine. However, I noticed that where the guys had installed the switches for the lights by each window seat were so low that I would lean on the switch with my back. I asked that they be moved up. And, I also noticed that the vanity lights connections looked too low. I asked Bill if Fred had gone by our spec document for the installation location for the vanities. He said he didn’t know. I grabbed the document which we kept in the house and checked to see where the lights were to be installed. We have tall mirrors for the bathrooms and Bill and I had measured cabinets, granite, backsplash and mirror months ago to determine height of the lights. We talked to Fred and he brought his tape measure and sure enough the lights were about 6 inches too low. Fred had everything fixed before they left.

And, we were wired!

This slideshow requires JavaScript.

The next day the temperatures dipped all day to single digits. Bill and I went down to the house to double-check if all the electrical outlets and switches were correct and in the right location, but it was too cold to do it. So, Bill and I spent the day running errands for the new house. We went to Benthall Brothers to pick out our garage doors; stopped by Fehrenbacher’s to drop off the signed contract and pick up some sample poplar pieces for staining samples; went to the Benjamin Moore paint store with all our samples to match and picked a stain color; and then went to an electrical supply store to buy wiring for Bill to hook up a large portable furnace to use in our house. I guess it was a good day to get all that done. We figured we wouldn’t have any contractor show up on that day!

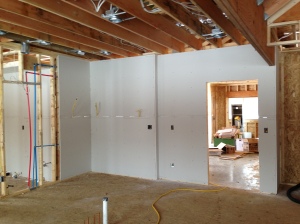
Friday the 13th Bart came and put up the drywall. And Jason’s crew came and looked at the range exhaust fan venting issue. Turns out they moved it over one stud and went up a lot further. Now, that will work!

Drywall installed along the kitchen/garage wall

Drywall installed along the kitchen/garage wall

Drywall along the laundry room/garage wall

Drywall along the laundry room/garage wall

New location of the venting for the range exhaust fan

New location of the venting for the range exhaust fan

Oh, I forgot to say that when the well guys came several weeks ago they said that there was a little white mold developing in our crawl space. YIKES! 😯 They said we probably needed to get that vapor barrier installed ASAP. Of course, the hold-up was waiting until the electric was run. Not that it was done, that barrier needed to get down. But, it was cold and nasty out. This was one PITA job Bill didn’t want to do. I didn’t want him to do it either. I told him to call a company does that and have them install it. We both checked out companies on the Internet and Bill sent an email to one to inquire what it would cost. They called. They said it would cost approximately $2K. Bill said he didn’t want to pay that much. Ugh!

Jim said he knew a recent college grad who worked construction while he was off from school. He asked if Bill wanted him to call and see if he would be interested in working for us. YES!!! Do not stop. Do not pass Go. Just call him right away! And, so he did. Todd said he’d be interested in working for us for several days. He started working last week. He cleaned up the garage and cleaned and vacuumed the house in preparation for the insulation crew on Tuesday and Wednesday for a couple of hours. They were coming Thursday, December 19.

We found out Monday that the temps were going to be soaring up into the 40s, 50s and even the 60s that week. Jim said it looked like they could pour the front porch! But, wait. We hadn’t picked out a color yet for the colored concrete. Where and how were we supposed to get that information? Jim said he’d get a brochure from Tony the concrete guy. Monday evening Jim brought home the brochure. He said if we could make a decision of what color by early Tuesday, he would call Tony and they could hopefully pour the concrete on Wednesday or Thursday. Bill looked at the brochure and picked Colonial Red. I said, “No Way!” The color decision was up to me.

I had a doctor’s appointment early Tuesday morning so I made arrangements to stop by the stone place so I could match up a concrete with our stone selection. With Rick the stone guy’s advice, I went with a lighter color than I originally wanted. He said from experience he said the darker colors show dirt and scratches more. So, I picked Sandstone for the colored concrete. I called Bill and he text Jim the color and said we wanted a smooth finish. Bill also asked if Tony could add some grit to the sealer so the concrete wouldn’t be as slippery when wet. He said he could!

Earlier in the week Bill and I went through the house to see about all the electrical stuff. We found a couple of outlets missing. And I decided to change the under-cabinet outlet wiring in the corner of the kitchen cabinets to a wall outlet. After doing some reading I found that for the appliances that people like to keep plugged in all the time (i.e., coffee pot) having the cords hanging down wasn’t a preference. So, the only appliance that Bill and I keep plugged in is the coffee pot and we had planned on keeping it in the corner. And, I discovered I had made a mistake and had the master bathroom outlets on each side of the vanity placed wrong. The hand towels would cover up the outlet. We wanted those moved. Bill called Fred and gave him a list of things and he said they’d be back out later in the week. The electrical crew came back on Wednesday and had everything done in 20 minutes! I’m telling you, these guys are fast!

Undercabinet wiring changed to outlet in kitchen corner cabinet area

Under-cabinet wiring changed to outlet in kitchen corner cabinet area

We did mess up on our labeling for the new computer area in the multi-purpose laundry room. Originally we thought we’d put two can lights above the area and had that on our label. But, when we were going room to room, I decided to move a nicer ceiling light I had originally purchased for the hall bathroom to our master closet. The master closet originally was going to have a flush mounted ceiling light just like the three in the laundry room. So, we decided we would just put that flush mounted light above the computer area. However, before the electrician’s came to install, we scratched out can lights and changed to ceiling light on the label, but forgot to scratch out the #2. So, the electricians ran two ceiling lights above the computer area. Instead of having them remove one of them, I decided to buy two smaller versions of the mounted ceiling lights – they were cheap at Menards. That way we have a spare light if anything breaks. 🙂

We had a full house at the site on Thursday, December 19. Les came with his insulation crew.

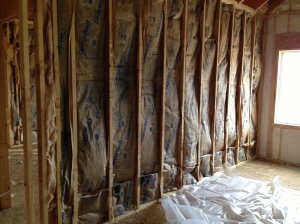
Netting with fiberglass blown in on all exterior walls and under the attic floor

Netting with fiberglass blown in on all exterior walls and under the attic floor

Spray foam up in the vaulted area of the family room

Spray foam up in the vaulted area of the family room and along the walls where the drywall was tacked up

Workers spraying 2" of the foam on all exterior walls prior to installing the netting and blowing in the fiberglass insulation

Workers spraying 2″ of the foam on all exterior walls prior to installing the netting and blowing in the fiberglass insulation

Fiberglass insulation all around that fireplace and exterior wall

Fiberglass insulation all around that fireplace and exterior wall

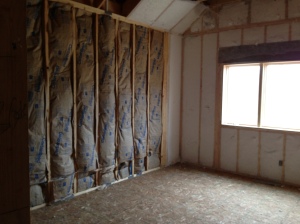
Sound barrier insulation between the family room and master bedroom

Sound barrier insulation between the family room and master bedroom

Sound barrier between the master bedroom and master bathroom

Sound barrier between the master bedroom and master bathroom

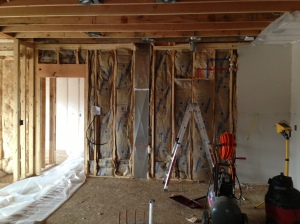
Sound barrier between the kitchen and laundry room walls

Sound barrier between the kitchen and laundry room walls

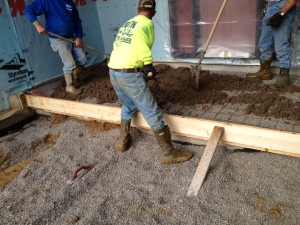
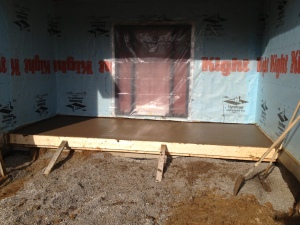
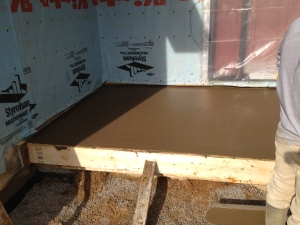
Tony and his crew came on Thursday, too, and poured the front porch.

Tony setting up for the concrete

Tony setting up for the concrete

Porch poured

Porch poured

Close-up of front porch

Close-up of front porch

I hope the color is going to be okay. He said we really won’t know the final color until the concrete is sealed. He said they cannot seal it for at least seven days. I’ll keep my fingers crossed that it will all match.

Bill called Todd in the afternoon since he had not shown up yet. There was a communication error. Todd thought Bill was supposed to call him when he wanted him to come out. So, Todd worked really late Thursday night in the crawl space. He also worked most of the day Friday, too. He is just about done installing the vapor barrier. Bill said he is doing a great job. He is supposed to come back today and clean all the mold with Borax and then he will be done. All the snow and ice melting last week from the high temps and 4 inches of rain over the weekend has caused a muddy mess down at the construction site.

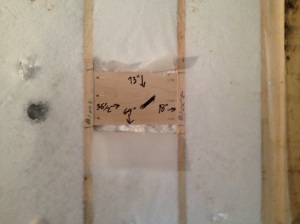
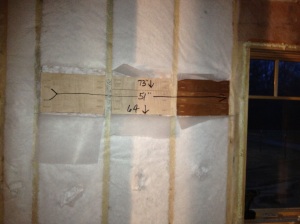
Bill spent the weekend putting up blocking for anything we might hang – pictures, cabinets, TVs, grab bars, towel racks, etc.

IMG_3191

IMG_3194IMG_3192

With the holidays approaching we are not sure if anyone will be working this week or next. I guess we will see what Santa brings our way.

We Are Thankful!

A dream doesn’t become reality through magic; it takes sweat, determination and hard work. ~Colin Powell

Our dream home is becoming a reality! And, boy is it taking a lot of sweat, determination and hard work!

This is a time to be thankful! We are thankful to everyone who is making this dream happen for Bill and me. We are thankful for God providing us with the means to find and purchase this lovely piece of land to share with our family. We are thankful for our son Bryan who is encouraging us from afar in this venture even though he won’t be living close by. We are thankful for Jill and Jim for giving us a place to live while we are building. We are thankful for Jim who is spearheading the construction of our home and finding all those little things that we might not even think of because we don’t have that knowledge to find those things! We are thankful for Jill who is handling the financial side of the construction by keeping up with the bills and software! We are also thankful to Jill for helping us envision how things will look and honestly telling us if something doesn’t look right. We are thankful for Jim, Sr. and Joan for letting us use their construction company for this endeavor. We are thankful for Jim, Sr.’s advise and expertise in structural engineering. We are thankful for having great subcontractors so far! And, lastly, I am thankful for Bill – who has worked over and above on this project by doing all the PITA jobs, keeping contact with all the subs via email and phone, cleaning the construction site, burning the excess wood, and working on the cabinets when he has time in-between all the other jobs.

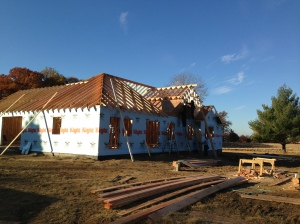
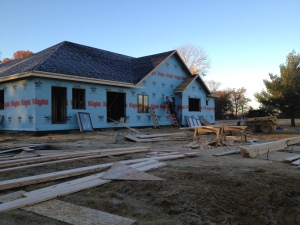
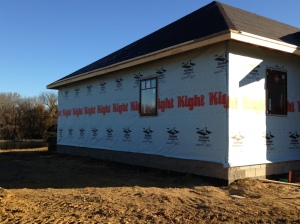
We’ve had a lot of progress since I last posted. The framers thought they were going to finish on Wednesday, Nov. 13, so Bill scheduled the roofer to come on Friday, Nov. 15. Well, the framers worked long hours into the dark several days but didn’t finish until Friday afternoon. We had a full house on Friday with the 5-man framing crew, a large roofing crew, and the roofing material company delivering the shingles. In addition, the HVAC and insulation guys came out to do walk-thru’s. And, of course, each of these people drove their own cars or trucks. They were parked all along our driveway and Jill and Jim’s driveway. Here are some pictures of the exterior framing.

Framing the back roof line

Framing the back roof line

Framing the west side of the house

Framing the west side of the house

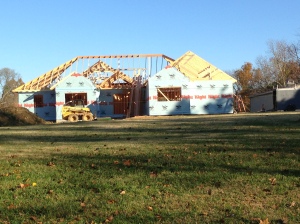
This shows how high the hip roof goes from the front

This shows how high the hip roof goes from the front

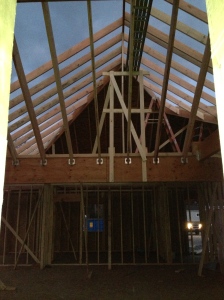
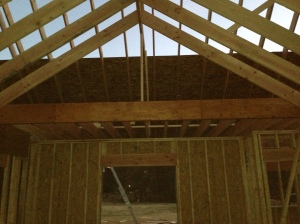
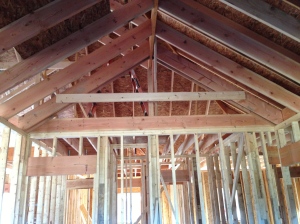
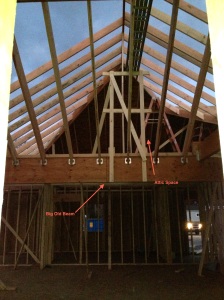
Looking up toward the roof from inside the family room, I was amazed how much space was above the kitchen and laundry room. This space would haunt me later. 😡

Attic space above kitchen and laundry

Attic space above kitchen and laundry

Roof line looking toward the front door

Roof line looking toward the front door

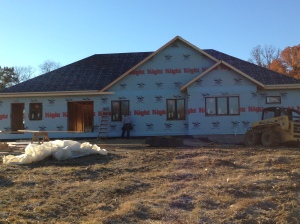
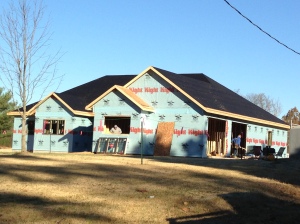
I loved when the framers put the sheet rock on the roof. Finally, I thought the exterior of the house looked like the elevation drawings of the house that Jim drew up for us. This is what the guys got done by the end of Wednesday, Nov. 13.

This slideshow requires JavaScript.

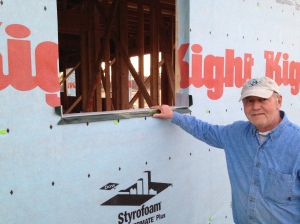
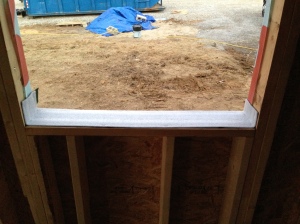
It was suggested we install some weather-stripping prior to the framers installing the windows. Alrighty then, who installs that? Hmmmmmm. While the framers finished the roof, Bill worked on his next PITA job – installing the weather-stripping. Bill did say it wasn’t that bad of a job.

Bill showing off his work.

Bill showing off his work.

Weather stripping close up

Weather stripping close up

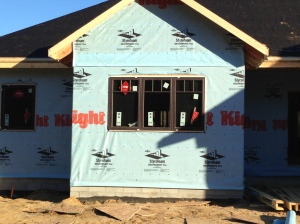
Thursday, Nov. 14, the framers installed our windows. Those went in really quick.

Windows going in

Windows going in

West wall

West wall

Close up of triple window in front bedroom

Close up of triple window in front bedroom

Rear of home

Rear of home

Preparing for the triple garage window

Preparing for the triple garage window

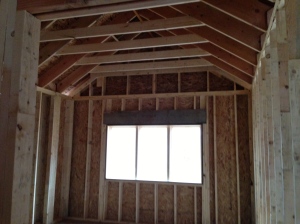
We had to go over with Greg (the framer) the height we wanted our vault to go in the family room and bedroom. Greg put up a board in the master bedroom to get my approval. The height on the flat center turned out to be about 10-1/2 ft high. Perfect! The vault would go up 18 inches from the 9 foot ceiling.

Board where the flat part of the vaulted ceiling would go in the master bedroom.

Board where the flat part of the vaulted ceiling would go in the master bedroom.

And, this is what the shape will look like. Imagine drywall up there. We wanted some extra height in the master bedroom as we have a large wooden canopy king bed going in there without it feeling dwarfed. Time will tell!

Master Bedroom vaulted ceiling with flat center

Master Bedroom vaulted ceiling with flat center

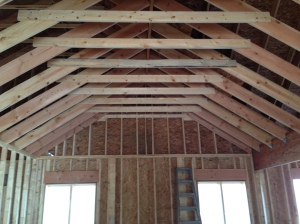
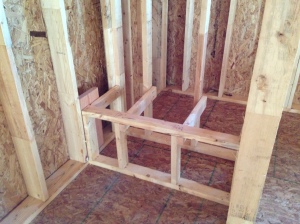
The other things on the framer’s list to complete on Thursday was the Family Room ceiling, the master walk-in shower bench, and building the fireplace structure.

Family Room vaulted ceiling

Family Room vaulted ceiling

The Family Room flat section goes up to about 14-1/2 feet.

Master bathroom shower bench

Master bathroom shower bench

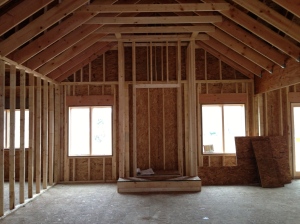
This is my favorite photo of the unfinished house so far. It’s the fireplace flanked by two eventual window seats and the vaulted with flat ceiling. I can’t wait to see how this will turn out cause I already like the shape it’s taking on.

Fireplace structure

Fireplace structure

Friday, Nov. 15, the roofers and framers were hammering away in the very early morning.

This slideshow requires JavaScript.

Bill picked up all the excess wood that he couldn’t use and burned away.

Lots to burn

Lots to burn

By the end of Friday we had the framing and roofing completed . . . or so we thought! 😕

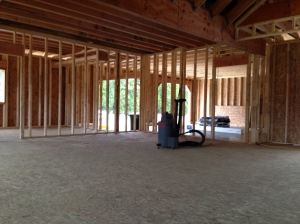
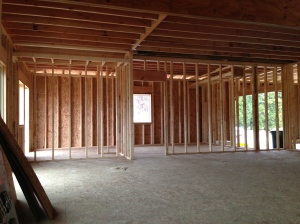
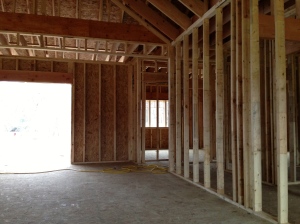
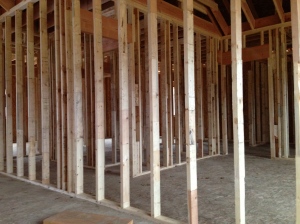
Saturday afternoon, Nov. 16, and Sunday, Nov. 17, Bill and I swept and vacuumed the interior of the house. We had to lay out, measure, and mark all the cabinets and appliances on the floor before the plumbers and HVAC guys came on Monday morning. It was a lot of work but also exciting to see if everything would fit the way we thought it should. Bill had built our cabinets prior to the house being framed, so we had to make sure everything was going to fit!

Looking from the family room toward the kitchen

Looking from the family room toward the kitchen

Looking from the family room toward the dining area on the left and kitchen to the right

Looking from the family room toward the dining area on the left and kitchen to the right

Looking toward the front door

Looking toward the front door

Looking from the family room to the hall closet on the right of the entryway

Looking from the family room to the hall closet on the right of the entryway

Looking through the wall that separates the family room and the master bedroom

Looking through the wall that separates the family room and the master bedroom

Let me back up a little here. Thursday, Rick from Lensing (where we are getting our bathroom vanities/cabinetry) came to measure. The framing wasn’t all complete (one of the walls for the window seat wasn’t done yet), but he came anyway. I wasn’t there. He told Bill that in our hall bath we would have to go with 18 inch depth cabinetry as there was not enough room for the 22 inch for which we had originally planned. 😯 Bill and I re-measured the bathroom during the weekend to see if it was framed correctly. We came up with the same measurements that were on our plan. How could this have happened? We knew the bathroom was going to be tight but I had 22 inch deep vanities in my 3D software and they fit and Jim had 22 inch standard vanities in his drawings. Something was off. The master bedroom closet was right behind this bathroom. I was willing to give up three to four inches if that wall could be moved. But, looking up, it appeared that the ceiling joists were laying right on the top of that wall. We figured it could not be moved without a lot of difficulty. Crud!

I didn’t know what to do. I really didn’t want 18 inch deep cabinets. Jill said maybe we could go with a standalone furniture-like vanity if they came in that depth. Jill said she would talk to Jim and have him look at the bathroom and see if he could see what options we might have. In the meantime, Bill and I went out to Lowe’s Saturday evening and looked at 18 inch depth cabinets. There weren’t many but I thought if that is what we had to do, then that would be what we would have built. However, I would have to get rid of the full-size cabinet next to the vanity. It would close in the bathroom too much.

Sunday, Jim walked through the house to see if everything was framed correctly. Jim, Sr. came over and we gave him his first tour of the house. Jim, Sr. made a comment that our beam that separates the kitchen/dining area from the family room was one big beam! And, I kept looking up at all that space up there, saying that I guess we should have thought about that space before. You could stand up in that space. I verbalized to both Jims and Bill that maybe we should have put a room up there. I had mentioned the space to Jill earlier, too. Even if we gave up part of the laundry room to build a staircase up there, she asked if I would really want to go up there without a window? Jim said if we wanted to do something with the space, now was the time. My head was spinning.

Should we make attic into a bonus room?

Should we make attic into a bonus room?

Jim and Bill climbed up the attic stairs and walked up in the area above the kitchen and laundry. Jim finally said, yes there would be enough room to make about a 14×14 room with slanted walls. He then asked if we wanted to spend about $15-20K to make it happen. And, I still wouldn’t have a window! Finally, I said, it’s not worth it. I also said that soon the drywall would be up and I wouldn’t look up at it and wonder. Besides, Bill and I said . . . this house would have no stairs. And, I wasn’t willing to give up my laundry room.

Once that was decided, we moved along. We had to see about that hall bathroom. The guys got to re-measuring the room and found that it was framed correctly. However, Jim discovered that the bathroom door had been placed in the wrong place. Jim said we had a couple of options. If we wanted to leave the door where it was and move the wall back into part of the closet space, we would have to check with the framer to see if the wall could be moved. Or, the easier thing would be to check with the plumber to see how deep the tub enclosure was going to be so we would know how many inches to have the framers move the door over. Bill decided to check with the plumber the next day.

Jim, Sr. said we really needed more support for that big old beam by the entry door from the garage. He said we didn’t want it to eventually sag. Bill discovered that the wall to divide the dining area from the family room was only 10 inches and it was supposed to be 2 ft 2 inches. Jim looked at the fireplace structure and asked Bill why the one support was so high up and then when Bill got out the instructions, they discovered a section had not been built. Bill said he would call Greg the framer later in the week to update him once we knew what we were going to do in that bathroom. Honestly, we decided that if these were the only things that were wrong in the whole house, we were in good shape. The framers had done an awesome job and we were pleased. And, Greg had told us he would be working close by and would come back and install the exterior doors as soon as they came in. These extras could be a “rainy day” for them.

Monday, Nov. 18, the plumbers and the HVAC guy came. The HVAC left aluminum pieces to where he thought vents should go. Bill and I had to go through the house and move the vents to where we wanted them to be installed when they came back. Thank goodness I had already placed my furniture in our 3D house planning software so I knew where I could move the vents.

Vent in the entry way

Vent in the entry way

Vent in the front bedroom

Vent in the front bedroom

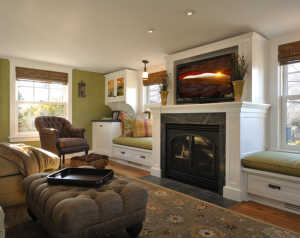
I told Bill I wanted the vents by the window seats to be installed in the toe-kick of the window seats. Bill had never seen that before. I showed him this picture and said that is what I wanted. He will tell the HVAC guys when they return Monday, the 25th.

Vents in the window seat toe-kick

Vents in the window seat toe-kick

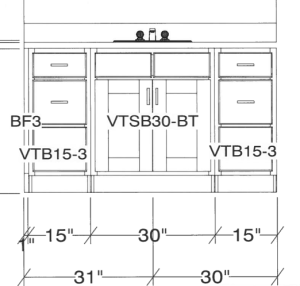
The plumbers did all their rough-in work last week. And, they installed the tub enclosure in the hall bath. Turned out the tub enclosure was an inch deeper than we thought it would be. Which made things even more challenging. If we moved the bathroom door, it would only give us an extra inch. Things weren’t working in our favor. So, we decided to make the bathroom door a 28 inch door instead of a 30 inch door. Our master bathroom door is 36 inches. That’s the one that is most important. The bathroom we are using in Jill’s bonus area has a 28 inch door and it works fine for us. So, by going with a smaller door and probably use a slightly less wide trim inside the bathroom, we can have a 20 inch deep vanity. I called the granite place to make sure the sink we purchased will fit with the smaller depth cabinet. It will. Whew! In addition to the tub enclosure being deeper, the framer was going to have to either move the wall back from the adjoining linen closet (so we had a wall to attach drywall) or make a fake wall right behind it. Again, we saw problems with moving the closet wall because it was supporting ceiling joists.  Here’s what we changed the cabinets in the hall bath to look like:

Hall bath cabinetry

Hall bath cabinetry

Here are photos of the plumbing work.

This slideshow requires JavaScript.

The well guys came back out this past week, too, and trenched and installed pipe from the well to the house. The framers ended up coming back out and fixed all our tweaks and did it in two hours. And, they installed our exterior laundry room door, too! Yay, Framers!!!!

Laundry room exterior door installed

Laundry room exterior door installed

Extra support for the big old beam

Extra support for the big old beam

Door frame changed in hall bath

Door frame changed in hall bath

Installed a fake wall behind the linen closet wall so they could hang drywall.

Installed a fake wall behind the linen closet wall so they could hang drywall.

Extended the window seat dividing wall to 2 ft 2 in

Extended the window seat dividing wall to 2 ft 2 in

Built the extra frame for the fireplace. It will be added to the structure after the fireplace is installed

Built the extra frame for the fireplace. It will be added to the structure after the fireplace is installed

Yesterday, I ended up sweeping up all the piles the plumbers left throughout the house like below.

Piles left by the plumbers

Piles left by the plumbers

Monday the HVAC guys are supposed to be back to make any exterior openings they need to do. Because either Monday or Tuesday, the Hardie Board siding is being installed. Monday, I have Rick from Lensing coming back to do final measuring for the bathrooms and window seats so we can place the order. We’ve decided to go with the brandywine finish for the cabinets as it matches the mahogany Bill is using for the kitchen cabinets.

The front door and the fireplace both got delayed. They were supposed to be installed this past week, but now both will supposedly be installed the week after Thanksgiving.

I’ve spent some time looking at materials for the kitchen backsplash. We are getting closer to making that decision. I’m leaning toward glossy tan subway tiles. We also got our granite samples and they match real well with the cabinets and tile we picked out for the two bathrooms. And, I had to purchase another two light fixtures. I wanted to have a light for each of the window seats. I order two more of the same sconces I had already purchased. Two will be in the interior of the entry way and the other two will be in the window seats.

Entry Sconces and Window Seat Sconces

Entry Sconces and Window Seat Sconces

And, I’m thinking I may just change the spot for the exercise bikes in the laundry room to my computer area. 😆 I’ll probably be on the computer way more than I’ll be on that bike. And, the view is so nice and I’d have my own space.

Future computer area

Future computer area

We are taking each day as it comes and doing what we can to make decisions and adjustments. So far it’s all been GOOD!

They Nailed It!

Measure twice, cut once. ~English Proverb

This blog post is going to be chocked full of photos. The framing crew did an amazing job since I last posted. Friday, November 1, they concentrated on sub-floor installation.

First floor board down!

First floor board down!

Ready to place down the board.

Ready to place down the board.

My view from the pole barn

My view from the pole barn

Making sure everything is plumb

Making sure everything is plumb

Lots of floor boards

Lots of floor boards

Everybody has a job

Everybody has a job

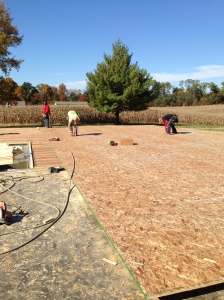
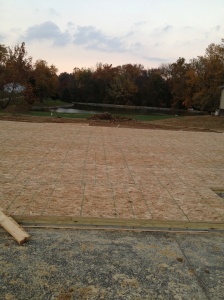
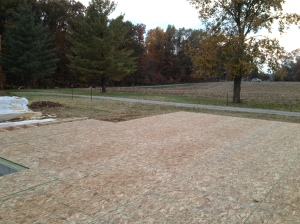
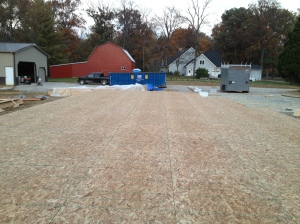
Here’s what it looked like at the end of Friday, November 1. All of the sub-floors installed except a small area in one of the front bedrooms. I enjoyed walking on the flooring the next day. The floor plan was beginning to take shape. I could start seeing where different rooms would be located.

IMG_0910

Looking from the front to the back of the house where you would enter from the garage.

IMG_0913

Looking from the family room area toward two front bedrooms

View from the west end looking east

View from the west end looking east

The framers glue and nail the floor boards. If you really want to take another step in making sure your floors don’t sag or hardwood floors squeak, you should screw the floor boards. Bill wanted that extra step. When Jill and Jim built their home, they had the construction crew screw the floors after the framers were done. There are no members of the construction crew any longer. If we want extras done, we either pay someone to do it or do it ourselves. Well, not “us.” It’s always Bill. Here was another PITA job.

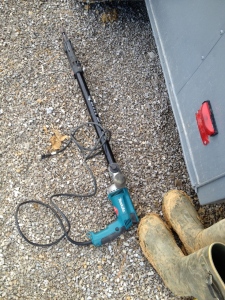
Bill talked with Greg the framer about screwing the floor boards and Greg said he had a screw gun that Bill could use.

Screw gun

Screw gun

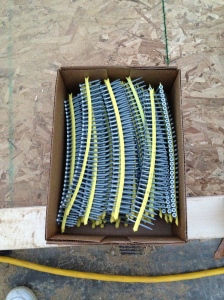
Bill ordered the screws from the lumber company and they delivered them the next time they came out.

Screws

Screws

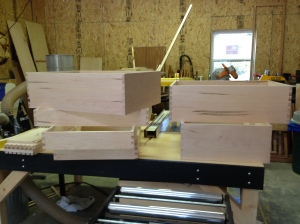
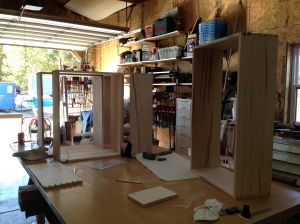
In between his shared General Contractor job, Bill worked on cabinets. He put the drawers together to make sure they all fit.

Kitchen cabinet drawers

Kitchen cabinet drawers

Drawers joined together without bottoms

Drawers joined together without bottoms

Monday was the day I was looking forward to watching the framers. It was the day that walls would be built. I decided to spend the day down at the pole barn watching. I was so excited! Since we had the time change early Sunday morning, the framing crew told Bill they would be ready to work EARLY! He went down to the pole barn at 6:00 am to open it up and get out any of their supplies he was storing for them. Bill said it would be awhile before they would work on any walls as they needed to finished the floors first. I told Bill to text me when he thought the walls would start going up.

At 9:00 am, Bill sent me this pic via text and it said – Walls!!!

IMG_2805Here’s the funny about this. I didn’t see or read the text before I went down to the pole barn shortly after 9:00 am. Bill came walking out smiling from ear to ear and asked, “Did the text get you down here quickly?” I said, “What text?” I looked at my phone and saw the text and the pic and noticed that there were no walls up on our house. Then Bill said the pic was from when Jill and Jim were building their house three years ago! He thought it would be a funny joke to play on me thinking I would have missed seeing all these wall going up. I guess it would have been a mean joke if it had worked! 🙄

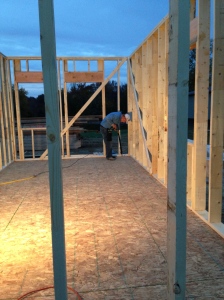
It was a cold morning but Bill let me use the heater because we had the garage doors open. I loved watching the framers from my chair in the pole barn. Here are some pics of how the first couple of walls went up. The framers would measure and cut and then nail the structures together while they were flat on the floor. Then they would lift the walls and nail them in place. Then they would nail another 2×6 to something else to make sure the wall didn’t fall.

This slideshow requires JavaScript.

Here is a set of photos showing the master bedroom and master bath walls going up.

The guys worked on several more walls on the floors but nothing was going up. Bill decided to go up to the house and eat lunch. I decided to stay and watch as the guys worked. Bill came back around 1:00 pm just in time to see this:

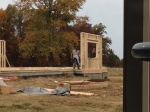
That was impressive! It took all five members of the crew to lift that wall. It was the family room wall with the two windows flanking the fireplace, then the dining room with door, then the laundry room wall with door.

The guys worked together to get it totally squared and in place. Greg was at one end and was calling down to the guy at the other end. He asked, “How is your end?” The guy said, “It’s almost perfect.” Greg said, “What do you mean almost perfect? Do you think Mr. Rogers wants to install his almost perfect cabinets on an almost perfect wall?” Everyone laughed. I like Greg.

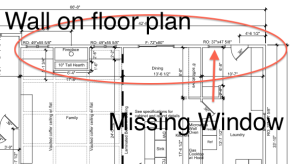
After they nailed the wall in place and I had time to sit and look at the wall, I noticed that something was wrong! 😯 I called Bill over and said, “Honey, there is a window missing in the laundry room next to the door.” He looked at me and said, “Are you sure?” I said, “Yep. Let me show you on the plans.” I told Bill I know the floor plan backwards and forwards.

Missing WindowBill went to talk with Greg to tell him about the missing window. They both looked at the floor plans Greg had and said he’d get that fixed. Shortly afterwards, some of the 2×6’s were removed.

Where the missing window would be installed

Where the missing window would be installed

While Bill and Greg were looking at the floor plans, Bill noticed that Greg didn’t have the correct measurements for the fireplace. That was along the same wall. They talked about a solution of how to fix the windows on each side of the wall that was already up. Greg said if he extended the fireplace a few more inches which was needed and he left the windows where they were they would not be symmetrical in placement to the fireplace. Bill had me come over and discuss if it would bother me or not about the windows. It was going to be 1-1/2 to 2 inch difference of showing drywall on one side. Bill said it wouldn’t bother him. I said I guess it was too little a difference to bother me. However the next day we talked with Greg again about the situation because the more I thought about it, the more I knew it would bug me. He said he’d re-do that part of the wall and make the window placement symmetrical. Thank you, Greg!

By the end of Monday, all the exterior walls were installed and some of the interior walls were up.

This slideshow requires JavaScript.

Bill decided to start screwing the sub-floor that evening.

IMG_2714

Bill using the screw gun

The framers were able to work a full day on Tuesday, a couple of hours on Wednesday morning before being rained out, and full days on Thursday and Friday. It is so much fun walking through the rooms that only a couple of days before were only on flat paper. Here are pics of the everything built by the end of Friday, November 8.

This slideshow requires JavaScript.

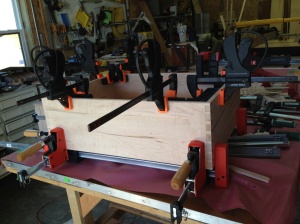
Greg thought they would be done framing by Wednesday, the 13th. Bill has called the plumber, HVAC guy, and roofer as they are next to come in. And, Bill continues to work on those cabinet drawers. As Bill always says, you can’t have enough clamps. To keep these big drawers square as the glue was drying, Bill had to use 12 clamps just on this one drawer. 🙂

One big drawer glued up

One big drawer glued up

I spent a lot of this weekend measuring the walls and rooms in the house to make sure everything was good. Especially the walls where Bill had built cabinets. These guys are great. If there was any difference (which there was only in a few places) the measurement difference was only off about 1/4 to 1/2 inch. Almost everything was spot on.

By the way, Bill did finish getting all the floors screwed. Another PITA job done!

Can’t wait to see how the house looks once all the gables and roof are on. What a difference a week made!

“Wood” You Please Build My House!

All things come to him who waits. ~Woodrow Wilson

Monday, October 28, early morning, Bill’s phone rings. It’s Jim, Sr. He says that the trusses were being delivered and Bill better get down there. It really is nice having neighbors close by who look out for you. 🙂 Bill rushed to change clothes and drove down to the site. Only to find that they had already left. But, they left us these!

Trusses

Trusses

Trusses

Trusses

For our house plan, our framer only uses trusses over the garage area. Thank goodness the delivery person dropped the trusses off next to the garage. The framer will bring in a crane to lift the trusses when he gets to that point in framing.

I came down shortly after the truss delivery to check out our first lumber delivery. I was excited! Bill said this was the first big smile on my face since we started this house-building project! 😆

Happy Sandy!

Happy Sandy!

I went back up to our apartment while Bill worked on making more wood for cabinets. Unfortunately, Sunday when he was making dovetails, he had an epic fail. 😥 Something went wrong with the dovetail jig or some piece of equipment and it apparently was slipping a little at a time without him knowing it. Pros: Bill has lots of practice pieces of drawer wood, lots of wood chips for the chickens, and lots of kindling. Cons: Bill had to make more wood and lost a day’s work.

I text Bill two hours later (10:00 am) to see if any more lumber had been delivered. He answered, “No!” I text again at noon and got the same reply. I asked if he should call Chuck at Kight Lumber. He text back a few minutes later and said that Chuck said lumber was on the way. So, I went down and waited and waited and waited. I enjoyed the sunshine and walked around the site dreaming how it would look in the next couple of months.

Bill came to a stopping point at making wood and decided to drive back up to the house to eat lunch. I stayed down at the pole barn. It was 1:30 pm. No sooner had Bill got up the driveway to Jill & Jim’s house, the truck pulled into our driveway and backed into the area in front of our house. I called Bill to tell him to come back down.

Lumber delivery truck

Lumber delivery truck

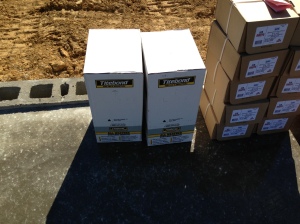
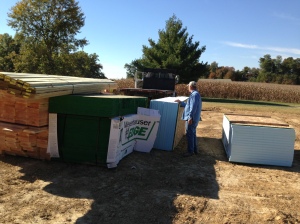
The guy started to unload a bunch of boxes and put them on the garage concrete.

IMG_2588IMG_2589

Nails

Nails

IMG_2591

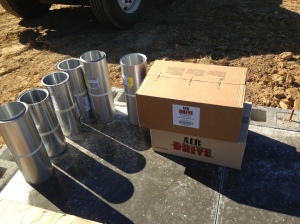
Silver rolls are termite shield

Stainless steel rolls are termite shield

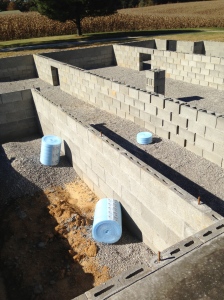
Sill plate sealer

Blue foam rolls – sill plate sealer

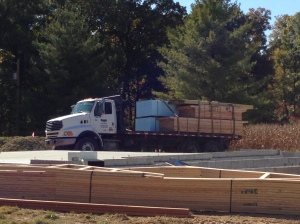
Closer up of lumber truck which had 2X6’s for exterior walls and insulation boards (blue boards).

Lumber truck

Lumber truck

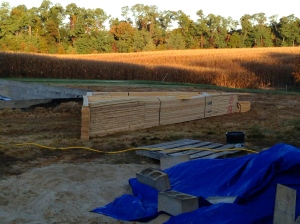
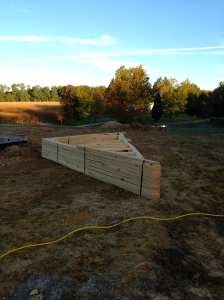
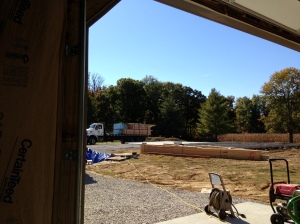
The delivery guy and Bill discussed where to unload the lumber and Bill suggested behind the house. So he moved the truck. I kept wondering how he was going to get all that lumber off the truck. We soon found out. Talk about “dropping off a load of lumber!”

If you watch the video you will hear me say, “hmmmm!” after those blue insulation boards fell off sideways! 😯 Thank goodness they were all okay.

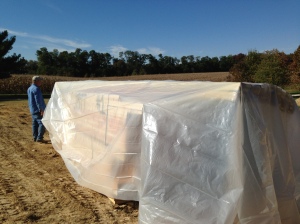
Bill checked on the lumber afterwards and all was fine. The lumber company also sent a box of heavy-duty plastic to cover the wood since we had a large weather system heading our way. Before leaving, the delivery guy covered the load of lumber.

Bill checking the lumber that was dropped off

Bill checking the lumber that was dropped off

Just a little chipped up, but not enough to hurt anything

Just a little chipped up, but not enough to hurt anything

Covering the lumber

Covering the lumber

All covered up

All covered up

Bill and I decided to cover the trusses and the boxes of supplies after the delivery guy left so nothing would get wet. Later in the afternoon the rest of the lumber was delivered. And those delivery guys covered that lumber, too.

More lumber trucks

More lumber trucks

Jim talked with the framer on Monday and he said he wouldn’t be able to start until Wednesday. Bill didn’t tell me that until Tuesday morning. He knew I would be disappointed. And, of course, I was. 😦 They were predicting rain for Wednesday and Thursday, so I told myself that the framer would probably start on Friday when it was supposed to be nice and sunny.

Tuesday, Chuck from Kight Lumber came out to check and make sure they had delivered everything. He and Bill went through the list and then looked at the house plans. I was at water aerobics and grocery shopping when all of this was going on. From what I gather, there was discussion about beams – how many, how long, where they were going, etc. Bill and Jim and Chuck work through this. A 28ft beam was delivered sometime Tuesday.

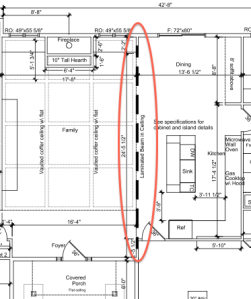
Tuesday evening Jim came up to the apartment to discuss “the beam” which we were installing between the family room and kitchen/dining area.

Beam on floor plan

Beam on floor plan

He said we had to decide how far down we wanted to install the beam so he could tell the framer in the morning. And, he said that the decision would be based on how high our trim for windows and doors was and where we were installing the headband throughout the house in each room. OMG! Bill and I looked at him with blank stares! 😯 We didn’t know how to answer him. Bill said he didn’t understand it all and even though I thought I understood part of it, I didn’t know the answers to tell Jim. Jim asked us to come downstairs and he’d show us what he was talking about using their beam as an example.

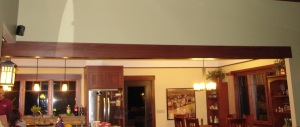
What Jill and Jim's beam looks like

What Jill and Jim’s beam looks like

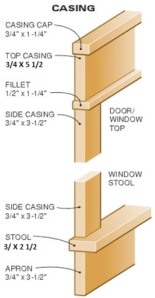
Jim said we had to decide how far to place the beam and then decide how much decorative trim (what you see in their beam above) we wanted to use that would come down to the height of the finished beam. As I’ve said before, we say our house is a mini Jim and Jill house as far as our interior trim. However, we do have a different trim for the top of our windows and doors. This is what ours will look like.

Trim Casings, Stool and Apron

Trim Casings, Stool and Apron

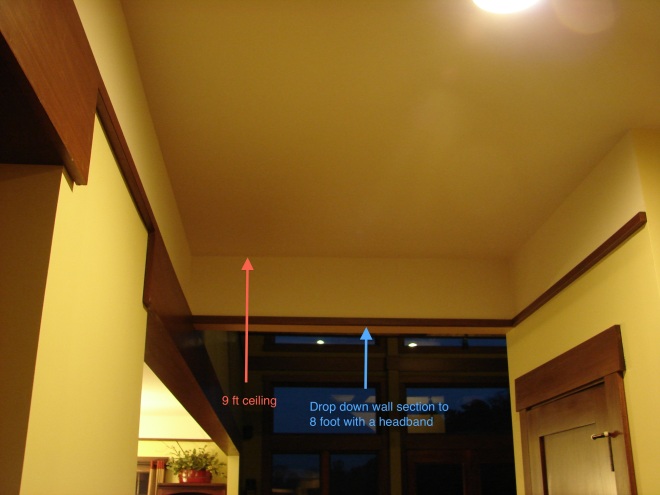
We said to Jim that we want our finished beam to come to the same height as theirs. Our frame was a slightly different size than J&J’s but Bill and Jim determined where the beam would hang. Jim wanted that information by the time he met with our framer at 7:30 the next morning on our property. Jim gave us some homework to do making sure we had the headband figured out in each area and that it would work at the same height we had chosen in the kitchen/dining/family room (at 8 ft). We decided on the headband height at 8 ft based on the fact that we have soffits in the dining area that come down to 8 ft. This was tricky business.

The beam had to be decided before the framer framed that section. So, that part was decided. However, Jim gave us some homework. He wanted us to look through our house plans and see if the headband worked at 8 ft throughout all the other rooms. Also, he said to think about if we wanted any more beams or decorative drop downs anywhere in the house. Here is an example of what Jill and Jim did in their hallway and entry into hall.

Drop down decorative dividers

Drop down decorative dividers

Here is a picture of how the headband works in J&J’s kitchen.

Beam and headband

Beam and headband

How headband circles around every room

How headband circles around every room

Jill and I are huge fans of architect Sarah Susanka. I think I own all of her Not So Big books. I LOVE her Home by Design book. She explains how you can break up or designate areas of your home just by using trim or drop-down ceilings. Jill and Jim used the decorative drop down trim above the opening when you transitioned from their entry to the hallway (seen in one of the photos above). Then, they used two more in the hallway. One was to designate that the area was still part of the main level living area (office and half-bath). The last one in the hall was to designate that area was another entry area from the garage (an open mud-room type entry with cubbies for coats and shoes).

Another idea that Susanka uses in her house designs for Prairie and Craftsman homes is the headband. The headband provides a connecting theme from room to room throughout the house. It can be made of different widths of wood. It is also a great way to make ceiling heights look taller. That is accomplished by painting the area above the headband a lighter color than the wall color. The ceiling is painted and finished in the same color as the section above the headband. Susanka says, “So the entire area of the room above the headband is like the lid of a box.”

So, back to our homework. The next morning Bill and I looked at our house plans. We decided we didn’t have any other areas in the house where we needed a beam as a divider. We double-checked the height of the headband in the kitchen/dining area by starting at the height of the soffits in the dining area and working our way around to the beam. The 8 ft height worked great and that would butt up to the top of the big decorative beam. The trim for the beam will be 12″ and that will bring the beam to a height of 7 foot from the floor. That was the height of J&J’s and it was perfect. Whew!

I looked through the plans and decided I thought we could add a drop-down decorative divider at the entrance to the hallway to the master bedroom suite area.

Entrance to Master Bedroom suite area

Entrance to Master Bedroom suite area

Bill and I thought we were okay as far as the headband in all the other rooms. I said I wasn’t planning on using a headband in the laundry/pantry room.

We went downstairs with our house plans and a camera. Thank goodness Jim and Jill were up and ready for work and gave us a few minutes to talk over ideas. We shared our idea about the decorative divider at the master bedroom hall and they thought that was good.

Drop down decorative trim to divide spaces

Drop down decorative trim at master bedroom hallway

Jill checked each of our rooms to make sure the headband at 8 ft would work and she said it did. She also said we could do the headband in the laundry/pantry with no problem. I may still do it. 😕 What’s a little more wood, right?

The only part I was struggling with was how to make a transition from our very wide entry (which has 9 ft ceilings) to our vaulted ceiling family room.

Entry to vaulted ceiling family room

Entry to vaulted ceiling family room

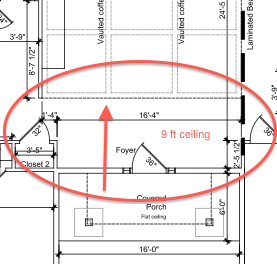
This is a wide span of 9 ft ceiling height, with a beam to the right that drops down to 7 ft. The ceiling height changes at the family room with a vaulted coffered ceiling with a flat center. I didn’t want a plain drywall opening at 9 foot. So Jill and Jim suggested we make a drop down 1 foot wall right before the dotted line designating transition from the entry to the family room (on the plans above). We will run a headband at the bottom of the wall to continue our theme. It will look like the entry wall from J&J’s hallway to their two-story family room. The exception will be our wall will be almost 18 feet wide!

Drop down wall from entry foyer to family room

Drop down wall from entry foyer to family room

Once all of that was decided, I took pictures of everything so we could use for the framer and trim carpenter. Bill asked that I print out the pictures so he could keep them down at the pole barn where he had a table designated for house plans, specification document, and photos.

Jim took the kids to school and came back to meet with the framer. Bill got everything together and headed down to the site. The good news was that the weather held off on Wednesday, temps got up to 75 degrees, and the framing crew got in a full day’s work. Here are pictures of what they accomplished the first day.

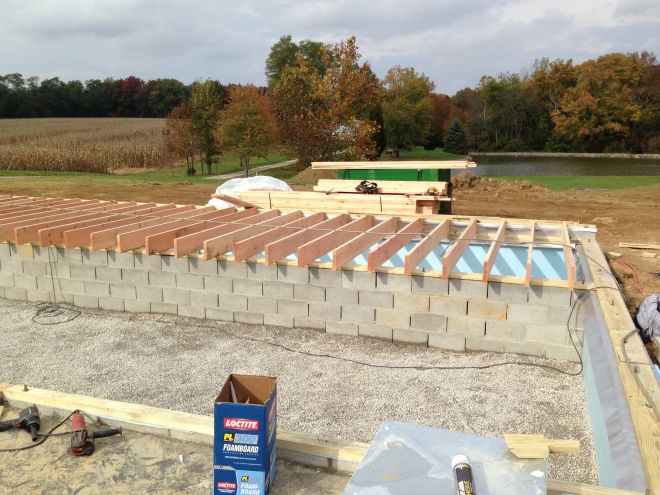
Installing insulation board

Installing insulation board

Installing the sill plate

Installing the sill plate

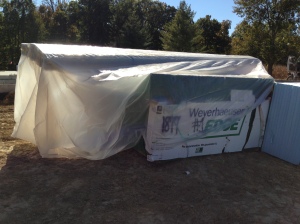
IMG_0884See the 28 ft beam in the photo below? There is only a part of it in the photo. It’s covered in plastic.

IMG_0885

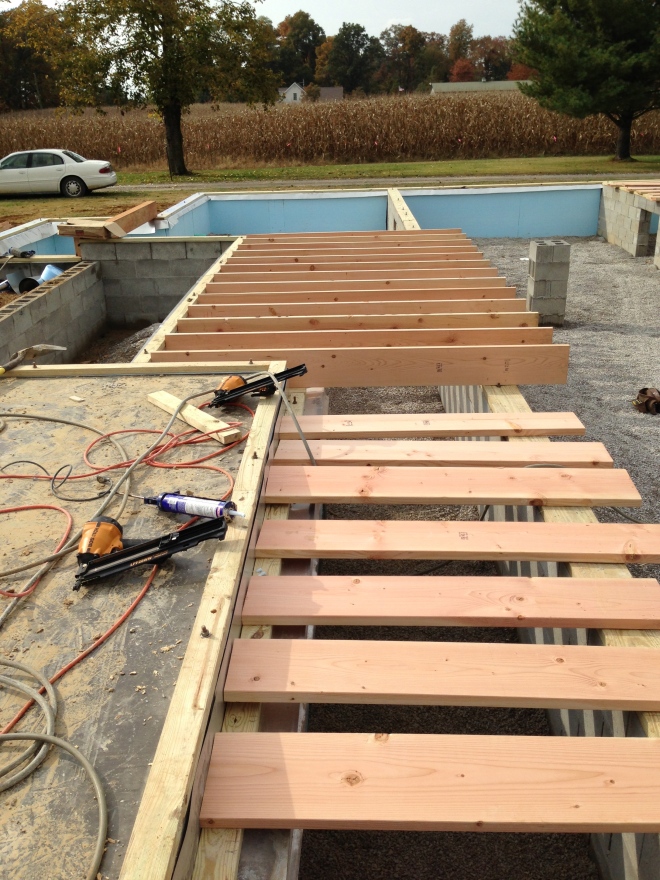
Floor joists going in

Floor joists going in

More floor joists laid out to nail

More floor joists laid out to nail

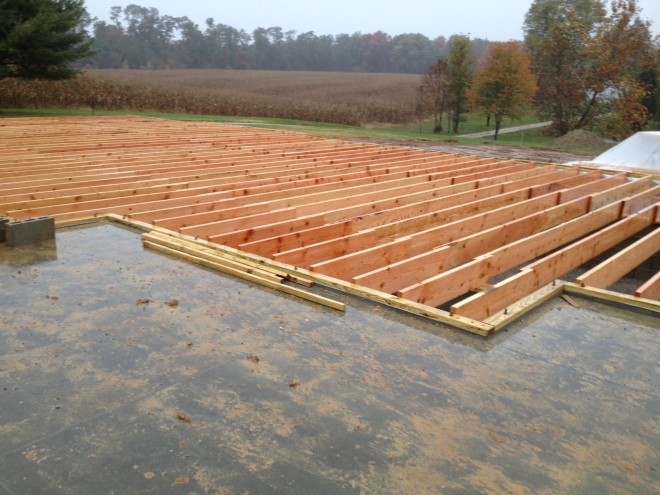
Day 1 completion

Day 1 completion

Day 1

End of Day 1

Floor joists done!

Floor joists done!

Bill has been working on the cabinets in-between helping out with the contractors. He got the dovetails working again.

Cabinet drawers dovetailed

Cabinet drawers dovetailed

Beautiful dovetail work!

Beautiful dovetail work!

Drawer without a bottom

Drawer without a bottom

One big 'ol drawer made

One big ‘ol drawer made

We had a washout today because of the weather. Here was our radar earlier this morning. Hasn’t gotten better.

Today's weather

Today’s weather

Can’t wait until I see some vertical boards going up tomorrow. Framer said the house would probably take 1-1/2 weeks to complete. I hope the weather holds up!

Nothing is Certain except Death, Taxes and Delays!

Can you tell I’m a little frustrated? Insert sarcasm font!

Yep, I got home yesterday from bible study to find this:

No Change

No Change

No lumber. 😦 Jim called the framer. He said it is now looking like Tuesday, Oct. 29. Unfortunately for us, he is having a tough time estimating how long it would take him to frame a 11,000 square foot home! Yep, that is what he is framing now. Ours should be a breeze for him!

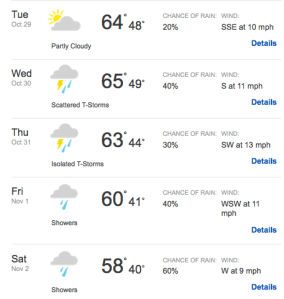
Lumber is supposed to be delivered Monday. Below is our forecast for next week. Bill has purchased tarps to cover the lumber.

Weather forecast

Weather forecast

This is a depressing post. 😥

Let me see if I can add something that made me chuckle yesterday. I was helping Jack with his fill in the blank spelling/vocabulary homework. The sentence was: We (blank) our grandparents with hugs and kisses. The spelling/vocabulary word was “welcome.” I said to Jack, “Hey, you don’t welcome me and Papa with hugs and kisses!” He looks at me and says, “That’s because you are like parents now since you live with us!” 😆 That Jack! He always has such insight.

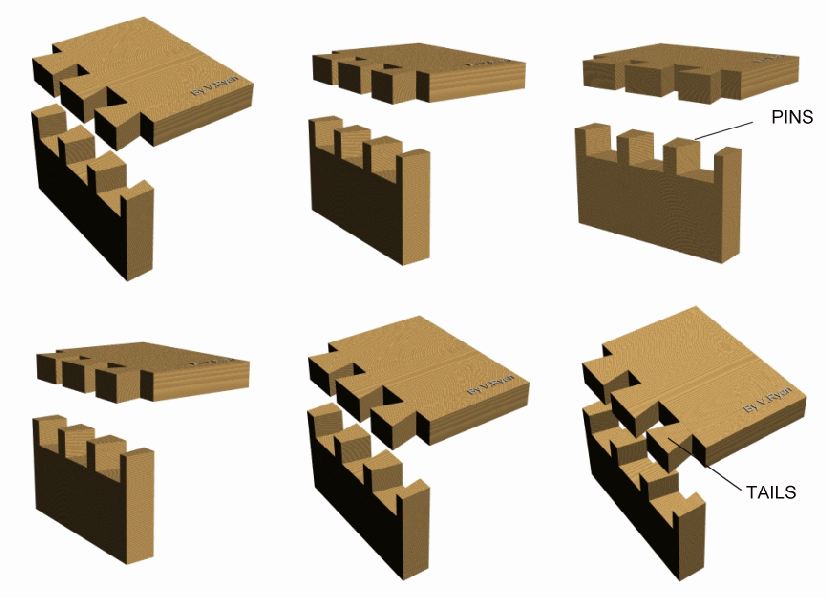
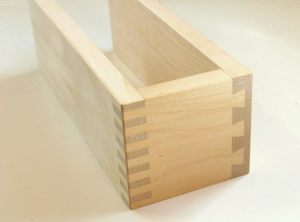
Bill is getting ready to make dovetails for the drawers for the kitchen cabinets. For those who don’t know what that is, here are a couple of pictures.

Tails & Pins of the Dovetail

Tails & Pins of the Dovetail

Dovetail joints

Dovetail joints

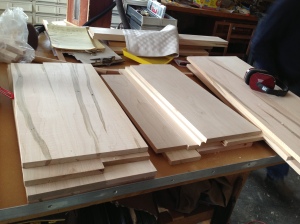
I took some pics of his “almost” finished wood for the drawers. He still has to cut the wood to size.

Wood for cabinet drawers

Wood for cabinet drawers

More wood for drawers

More wood for drawers

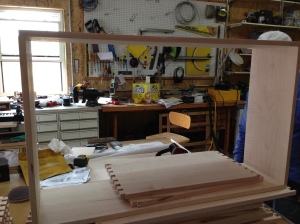
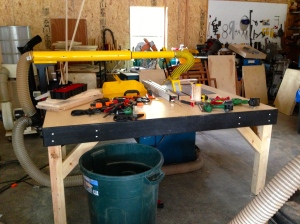
And, here is a shot of his newly built table saw. He said he didn’t clean it up before I took the picture. But, I told him this is the way it usually looks when he’s working with wood, so might as well show it that way.
Saw table

Saw table

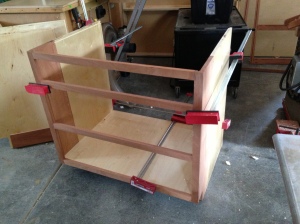
It was good to see one of my kitchen cabinets framed again. I had helped Bill take them all apart when we sold our home and put all the wood pieces in storage. Bill put together the gas stove-top cabinet to start. He needs to temporarily put the cabinets together to make sure the drawers, doors, hinges, slides, and handles will fit. All the drawers and doors will be soft-close. No banging dishes in my kitchen! Once all of those are done, he’ll take the cabinets apart again so he can put the Danish oil on them then apply layers of finish.

Stove-top cabinet

Stove-top cabinet

Notice Bill’s use of some of his clamps? You can never have enough clamps! 😀

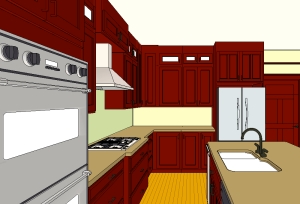
To explain the cabinet above, the face frame is made of mahogany wood. The side extensions are made of mahogany because this cabinet will extend out 3″ from the other cabinets (like a bump-out cabinet) and the extension will be visible. The sides are prefinished plywood. Here is a look at what the kitchen cabinets will look like some day.

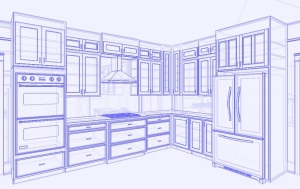
Layout of cabinets

Layout of cabinets

In the photo below the granite will not be that color.

Mahogany color cabinets

Mahogany color cabinets and island

Shows the bump out of the stove top cabinet

Shows the bump out of the stove top cabinet

Tuesday Bill and I stopped at Tri-State Stone and Rick was in the process of ordering our stone and creating an invoice for us. He said he was so glad we stopped in because he wanted to get my opinion on the trim stone for the fireplace. He had three different choices for us and he was leaning toward one that looked very similar to the trim squares I had designed. Did I take photos of any of them? Noooooooo! What is wrong with me? 😡 The smoother and lighter stone trim was my favorite. However, the color had a peachy look to it. Of course, Bill liked the peachy color but shook his head and said he had no say in colors. (That is so right!) I asked Rick if he could get the trim and keystone in a color that would blend in with the Centurion Suede stones – a greyish brown. He said he could. It’s a done deal now. The stone is being ordered.

And, the weather has turned cold. Bill is finding that the insulation alone is not enough to keep him warm in his pole barn with this cold front that came in. Since the radiant floor heat isn’t ready yet, Bill had to find another way to be able to heat the barn while he makes cabinets this winter. Yesterday, he bought an electric heater. It is supposed to heat up to 1500 square feet. I hope it works for him. He is trying it out today.

Electric Heater

Electric Heater

But he had to buy a 10 gauge extension cord to reach the saw post to plug it in! That thing cost almost as much as the heater!

10 gauge extension cord

10 gauge extension cord

If the heater works we might also use it to heat the house when they install the dry wall. Well, that is, if we ever get our framer to begin framing!

Until the next delay . . . 🙂

And so we begin!

The way to get started is to quit talking and begin doing. ~Walt Disney

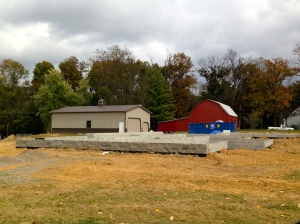
We hit the ground running after I posted on Saturday morning. I went down to help Bill while he staked off a huge section of the front yard so no one would drive on it. Basically, I only held the stake straight until Bill pounded it down into the ground.

Stake Pounding

Stake Pounding

Yard staked out

Yard staked out

Then, I got called off the survey staking committee and Jill put me on chauffeur duty to pick up Jack from a Boys Scout event. It takes a village to do all the work on the compound. 🙂 Joan took Megan shopping at the school’s marketplace and shopping for birthday ideas. Jill cleaned house.  Jim, Jim, Sr., and Bill did the staking for the house. We had to get everything done before Jack’s 2:30 football game.

Not sure if you can see or not, but there are red survey flags in those piles of mud. The flags mark the four outer corners of the house so the foundation guys can pour the footers in the right place.

Survey flags

Survey flags

IMG_2285

IMG_2284

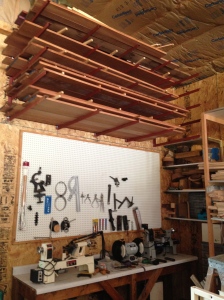
Sunday Bill went shopping to buy all the electrical components to hook up his cabinet making equipment to a generator. He had tested starting the different pieces of equipment with the generator. Some had better results than others. But, everything eventually started and it seems that he will be able to run his equipment off the generator since we have no electricity in the pole barn yet. Bill’s pole barn “open house” has been delayed a week because of his construction duties. However, Bill has made great strides in getting the workshop almost ready for duty. He would only let me take a couple of photos until he has his open house. Wonder if he’s going to serve refreshments? 😉

Back workbench with raw mahogany wood stored above

Back workbench with raw mahogany wood stored above

Sunday, I spent a lot of time measuring Jill’s fireplace and windows again. Unfortunately, when Bill and I discussed the window seats on each side of the fireplace and window and window seat measurements, we discovered we needed to make our fireplace larger than was drawn on our house plans! 😯 The fireplace and windows are gonna be the death of me yet! I was dreading breaking the news to Jim that we needed to make more changes. However, it is better to find out these mistakes before we start framing and before we order the windows. And, Bill and I looked again about how we would extend the fireplace stone up to the ceiling and it just wasn’t going to work either. Grrrr.

We had a construction meeting with Jim on Sunday evening (Sept. 22). He gave us a lot of homework to do on Monday. The three of us each had our to-do lists.

  • Jim worked with our vendor for Hardiboard siding and trim; updated house plans; made phone calls and arranged for permits; and lots of other behind the scene things he does – like discover that our bid for trusses was not for attic trusses.
  • Bill arranged for a porta potty and dumpster; called another company to compare block prices; called vendor we planned to use for block material and had them resubmit their bid with updated information and arranged for them to deliver block on Wednesday; called another roofing material vendor and inquired about pricing; both of us visited vendor and picked out shingles and got a quote; called lumber company and had them resubmit their bid with attic trusses; ordered sand; and called Vectren to ask about electricity and gas hookups; cut our grass; moved the trailer to the side of the pole barn; arranged a hose hookup from Jim, Sr’s water-spout down by the lake; and found spots where the porta potty and dumpster could be stored during construction. Whew! He was a busy guy.
  • I had to re-work all our windows and re-design our fireplace. I also had my household chores of 5 loads of laundry, unloaded and loaded dishwasher, picked up kids from bus stop, wrapped Megan’s birthday gift, took Jack to football practice, and helped Jill prepare Megan’s birthday dinner.
Jim, Bill and I shared lots of phone calls that day. Jim found out that the Health Department said we needed to add more soil over the area where we were having the septic installed. Saturday when we were talking with our septic installer (same guy who did our excavation for pole barn and our driveway and who will also be doing our final grading), he said he could get top soil for a cheap price per dump truck if we’d like it. Bill wanted to get a couple of loads for grading and had made arrangements for him to bring that on Monday. Well, when we found out we needed more soil for the front area, Jim told him to just bring it, too. I think we ended up with two loads in the back and four loads in the front. It’s really nice soil.
Top soil for final grading

Top soil for final grading

Soil for covering the septic area

Soil for covering the septic area

While I was re-working the window schedule, I asked Bill if he thought our windows for the front bedrooms would be down too low. We measured everything again! I called the window guy and asked him what the next size window height down would be. We would have to go down from 56″ to 48″ in height. Where I loved the taller windows, I really wanted the tops of the windows and the doors to match across the exterior of the house. But, if I wanted to keep the 56″ height and still have them higher from the floor board, I would have to raise the top height. Again, Bill went outside to measure where that would take our windows. It ended up they would be up so high that they would be one board down from our trim board. That just wasn’t gonna look right. I ended up using our Home Architect 3D software again and changed all the window sizes to get a better look. Bill and I made the decision to go with 48″ heights in the bedrooms and in the laundry room. We left the two window seats at 56″ because those windows will be lower to the floor. Of course, then I had to call the window guy back and ask him to give us a new quote. Brother!

I played with the fireplace and came up with a new design. Here’s what it might look like.

Fireplace with border

Fireplace with border

Early Tuesday morning Bill went down to the pole barn – what is now being called our construction headquarters. The first thing to arrive was important. 😀

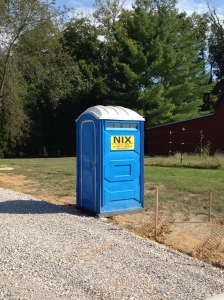
Porta Potty!

Porta Potty!

By the time I left to go to water aerobics around 10:15, this guy was running this bobcat back and forth trying to smooth out the area where the footers would be dug and poured.

Bob cat busy

Bobcat busy

It wasn’t long and the dumpster guy came to assess the area for the dumpster. Bill decided to put it to the right of the turnaround rock in pic below. The guy said it should be delivered sometime this week.

IMG_2295

I ran errands after water aerobics (even got my flu shot) and got home just in time to pick up the grandkids from the bus stop. Jill and Jim’s yard to the west of their driveway was lined with trucks and there was a wheeled digger with a backhoe digging those trenches for the footers.

Wheeled digger with backhoe

Wheeled digger with backhoe

While I was parked at the end of the driveway waiting for the bus, some guy drove his car into the grass to the east of where I was sitting and sped around me and parked off the driveway near the construction. He slowly got out of his car and I noticed he was a big guy. Didn’t look like he was part of the construction crew to me. I mentioned him to Jim and Bill that evening and they weren’t sure who he was. It turns out he was probably the county concrete footing inspector cause we got an email the next day that he had been out and approved it. Yay!

Bill held down the fort at the construction site and I took the grandkids up to the house. The foundation crew worked until about 5:00-5:30. Here are some photos of the afternoon adventures.

This slideshow requires JavaScript.

Wednesday I went to bible study and ran more errands. Since we live out a ways, we try to combine our trips into town. Jill warned us that our gas bill would go up and it has! So, while I was gone, Bill had another busy day at the construction site. First up was the mortar sand delivery for the block installers.

Sand delivery

Sand delivery

On Monday Bill had called the plumber to see if he needed to come out before the block guys came. So, he came Wednesday morning. We had one plumber do the radiant heat and the rough-in for the half-bath in the pole barn. We were using another plumber for the house and the completion of the pole barn stuff. It appears that the first plumber may not have roughed-in the half-bath the way the second plumber would have liked it. 😳 We hope he can come up with a remedy. What we do know is that we cannot use the toilet that Jim’s parents were giving us. And, there’s something about a grinder pump thing-a-ma-jig. The plumber also put some pipes down to approximate areas where he would need plumbing access. Bill said the block guys would put them in the proper place.

Vectren came out in the early afternoon to assess the situation for temporary and permanent electrical service. The gas guy called Bill earlier in the day and said instead of him coming out, he would just get with the electric guy afterwards. Bill talked to him about transformers and whether we need one now or later. We will need a new one on the pole at the end of our driveway. They talked about if we wanted temporary electric we could run it from Jim & Jill’s transformer at the end of their driveway. But, they would have to go up 18 feet for the wires to be pulled over and Bill said that wouldn’t work with the large trucks coming in and out. If we put a transformer on our pole now, it would be a 200 amp one. However, since the house will be 400 amp, we’d have to have another transformer installed when the permanent service was needed. The Vectren guy told Bill he needed to call Vectren marketing and get a price for what the transformers might cost. We also will need to fill out a form with a checklist of any possible equipment in the house and pole barn that we might be running in the future. They have some sort of 3-year deal where they assess what revenue will be generated on what you will use and that is what they base the cost of how much we’ll pay for the transformer. Sounds complicated to me! 🙄 Anyway, the Vectren guy left Bill a voice-mail message late yesterday that they could get us temporary electrical service by January 2014! 😯 That’s not gonna work. Bill will be calling the Vectren guy back today.
The block delivery arrived around 2:00.
Block delivery

Block delivery

Heavy crane to lift the block

Heavy crane to lift the block

Today someone from the foundation crew will be back to remove all the ground around the footers to make the ground level with the footers. You can see from the pic below what I’m talking about.

Ground to be leveled

Ground to be leveled

The block installers are scheduled to arrive Friday to install our block.

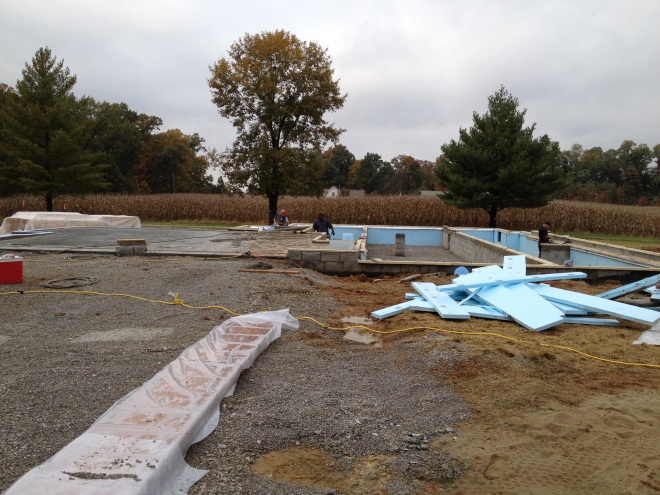
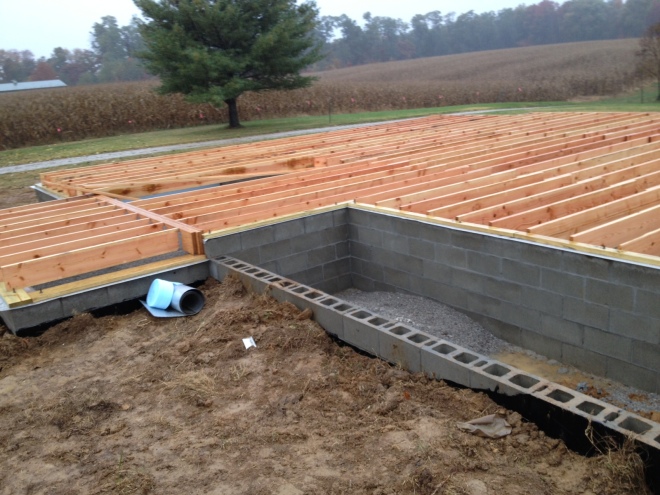
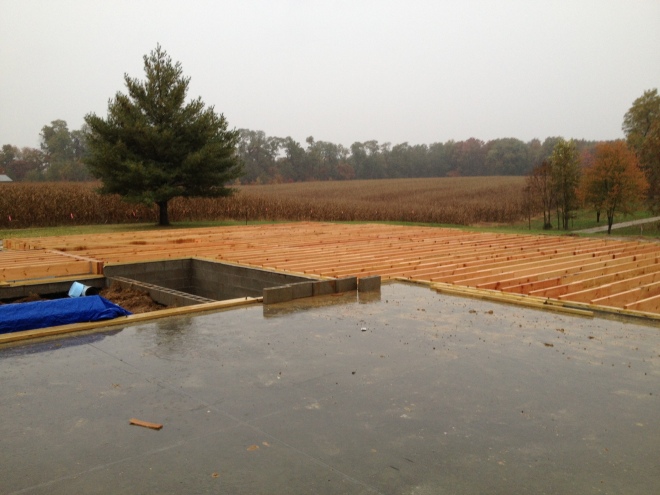
When Jim started to call subs over the weekend to schedule them he found out our framer would not be available for another 3 weeks! He checked on our second choice framer and he was 4-5 weeks out from being available. So, we are going to wait for our first choice guy. Actually, I’m kind of glad we will have a delay because I’m taking a trip and I don’t want to miss the framing of our house. I want a front-row seat. Don’t get me wrong, the footers and block are exciting! However, I think the framing is the best part in the beginning. It finally brings all these months and years of planning from a flat or 3D rendering to an actual structure that we can stand in and walk through.
It is Bill’s hope that he will be able to start working on cabinets in the next two weeks.

Until then . . .